


















Configuration Reference
Settings
| Workflow | Select | Use the company dataset only, or let Datablist run a Google search on the names it misses |
| Target Country | Text | Narrow the search to one country. Filters the dataset and sets the country for Google |
| Define target country per item | Checkbox | Adds a Target Country input so you can set the country per row |
| Accept non root websites | Checkbox | Allow results that are not a root domain, e.g. a company page on a hosting platform |
| Skip following domains | LongText | Comma-separated domains to exclude on top of the built-in directory and social network list |
| Only Process Google Cached Results | Checkbox | Reuse saved Google results only, run no new live searches, and skip dataset results |
Inputs
| Company Name | Text | The name of the company to look up, e.g. google |
| Target Country | Text | Only present when Define target country per item is enabled. ISO 3166 code or English name |
Outputs
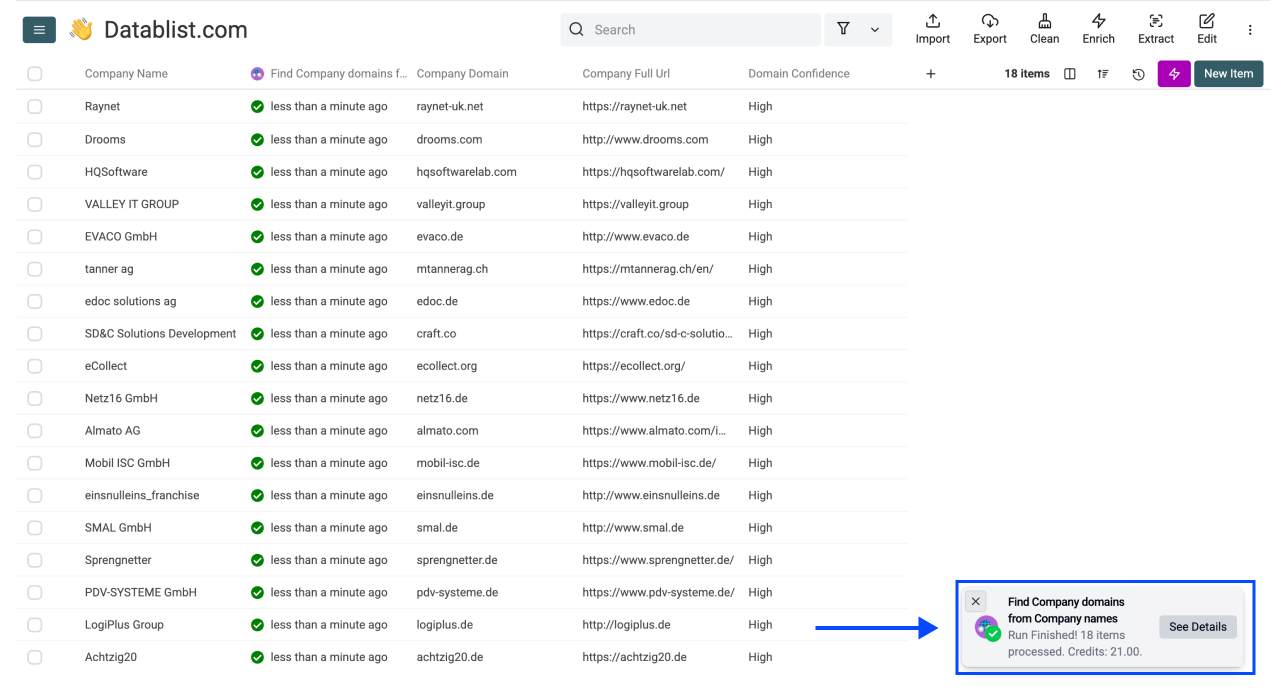
| Company Domain | Text | The company domain, e.g. google.com, when one is found |
| Company Full Url | Url | The full company URL, e.g. https://www.google.com, when one is found |
| Domain Confidence | Text | How strong the match is: High, Medium, Low, or Very Low |
| Status | Text | One of success, not_found, or empty_name |
Step-by-Step Guide
Step 1: Sign Up And Upload Your Data
First, sign up for Datablist.com
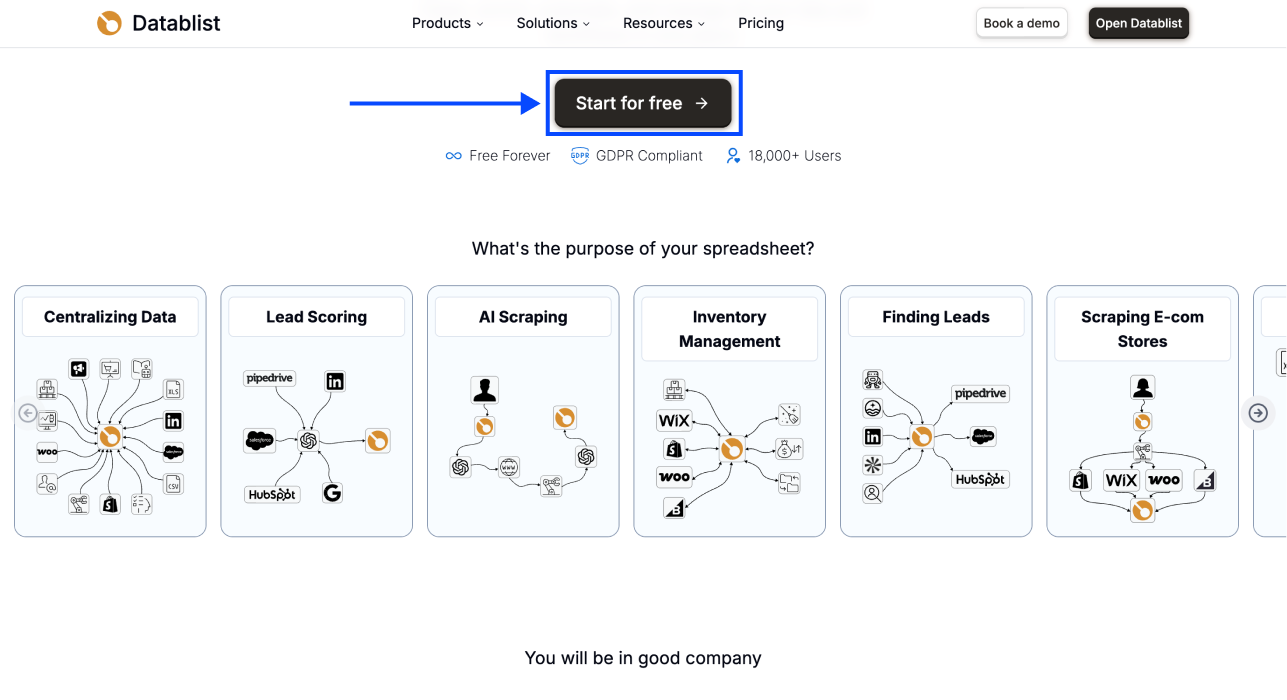
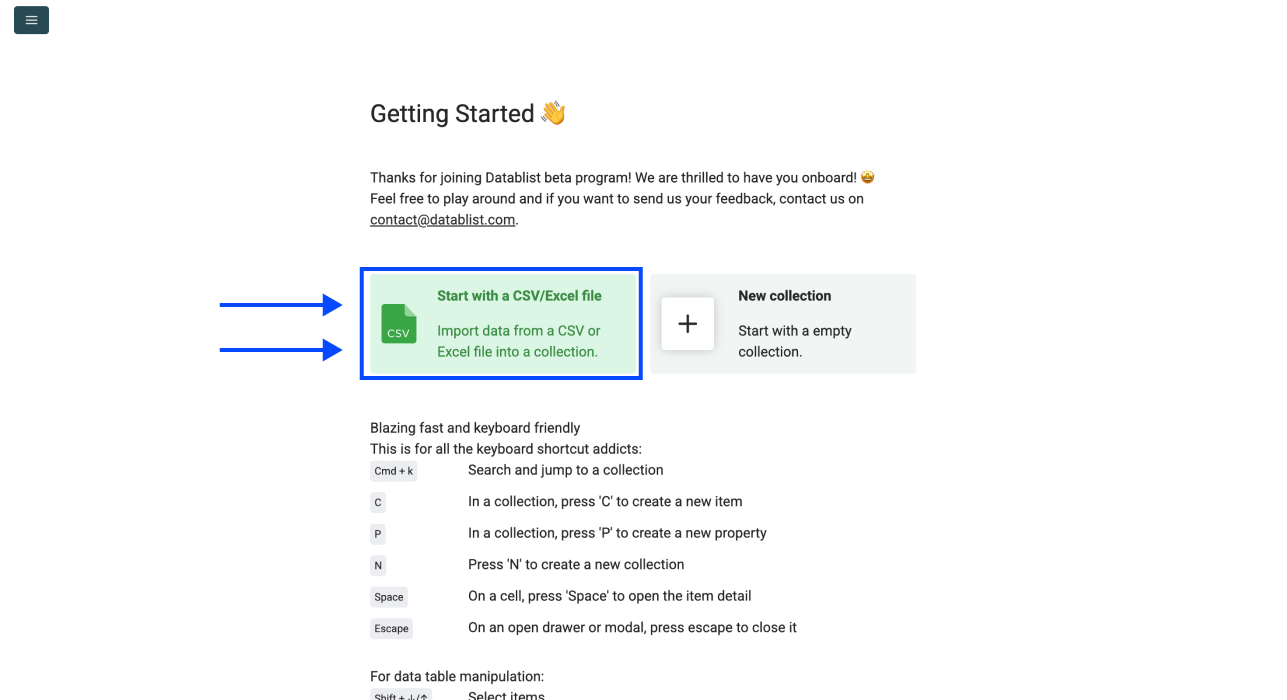
Then, upload your CSV or Excel file containing your list of company names
Step 2: Open The Find Company Domains Enrichment
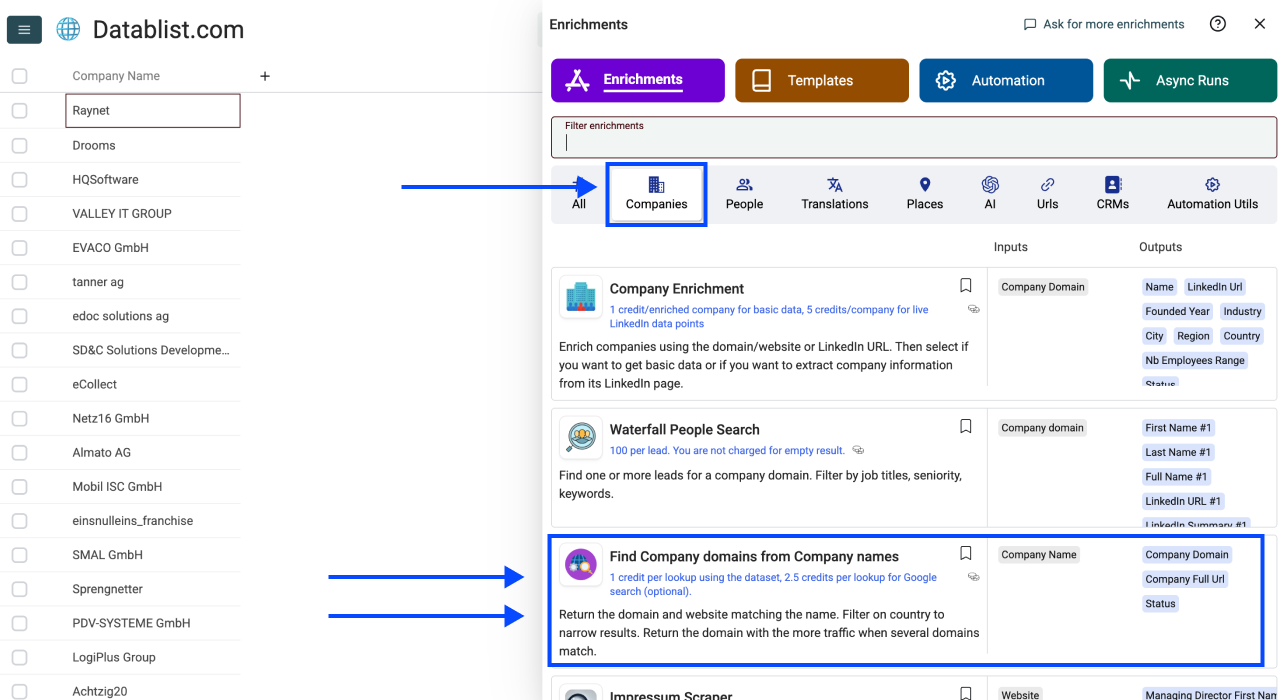
1. Click Enrich in the top menu
2. Open the Companies tab
3. Select Find Company Domain from Company Name.
Step 3: Set The Workflow
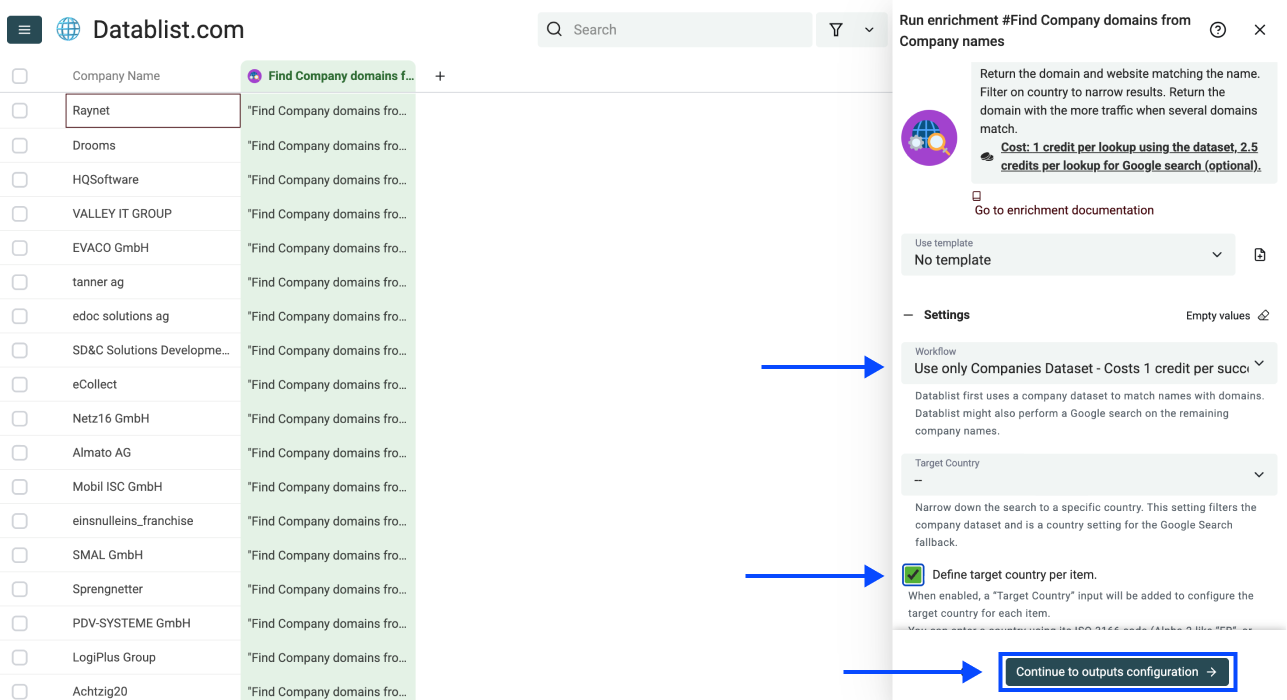
Under Workflow, pick "Use only companies dataset." This is the cheapest path, at 1 credit per domain found.
Set the Target Country, or check Define Target Country By Item if each row carries its own country column.
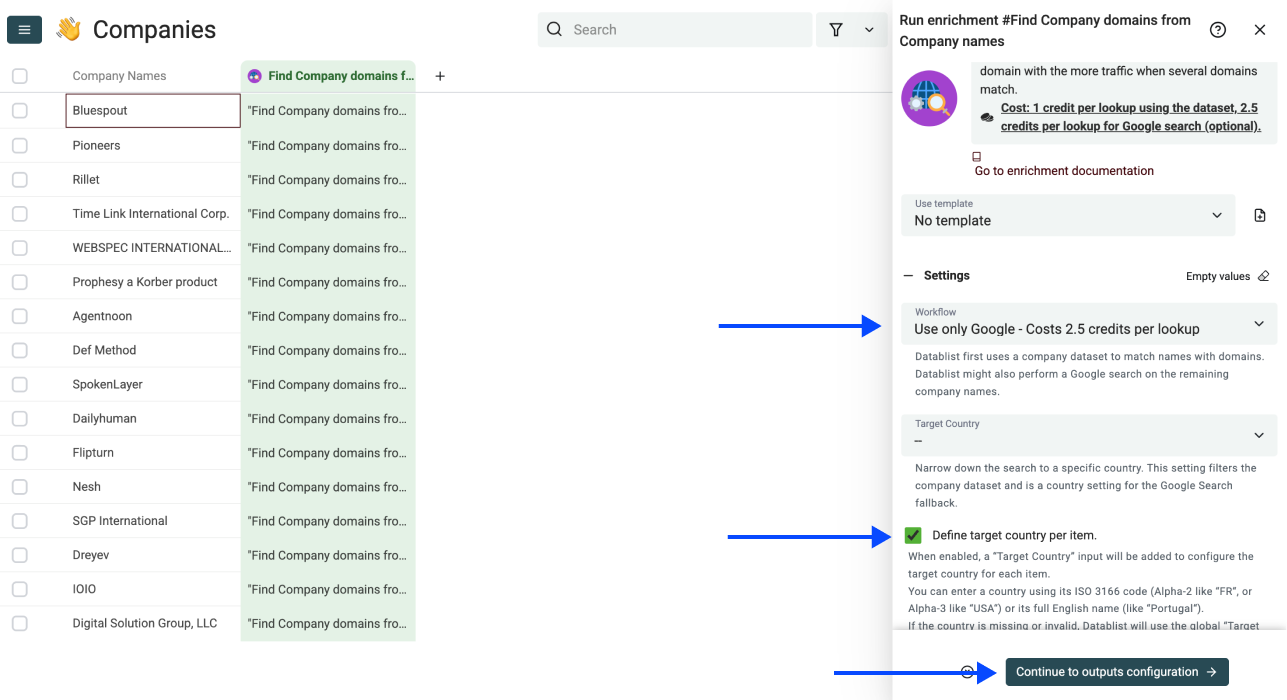
To cover the names the dataset misses, pick the Google workflow instead. Datablist then runs a live search on the remaining names, at 2.5 credits per lookup, charged whether or not a domain comes back.
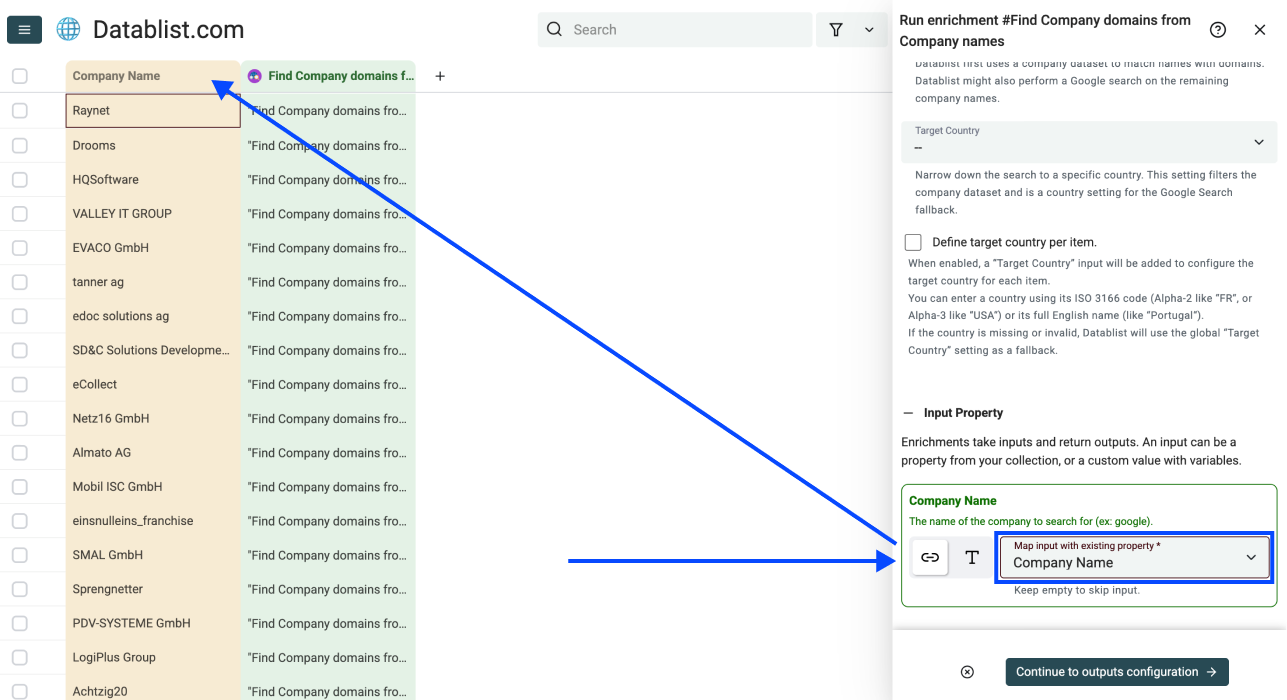
Step 4: Map Your Company Name Column
1. Set the column that holds your company names as the Input Property
2. Click on Continue to outputs configuration
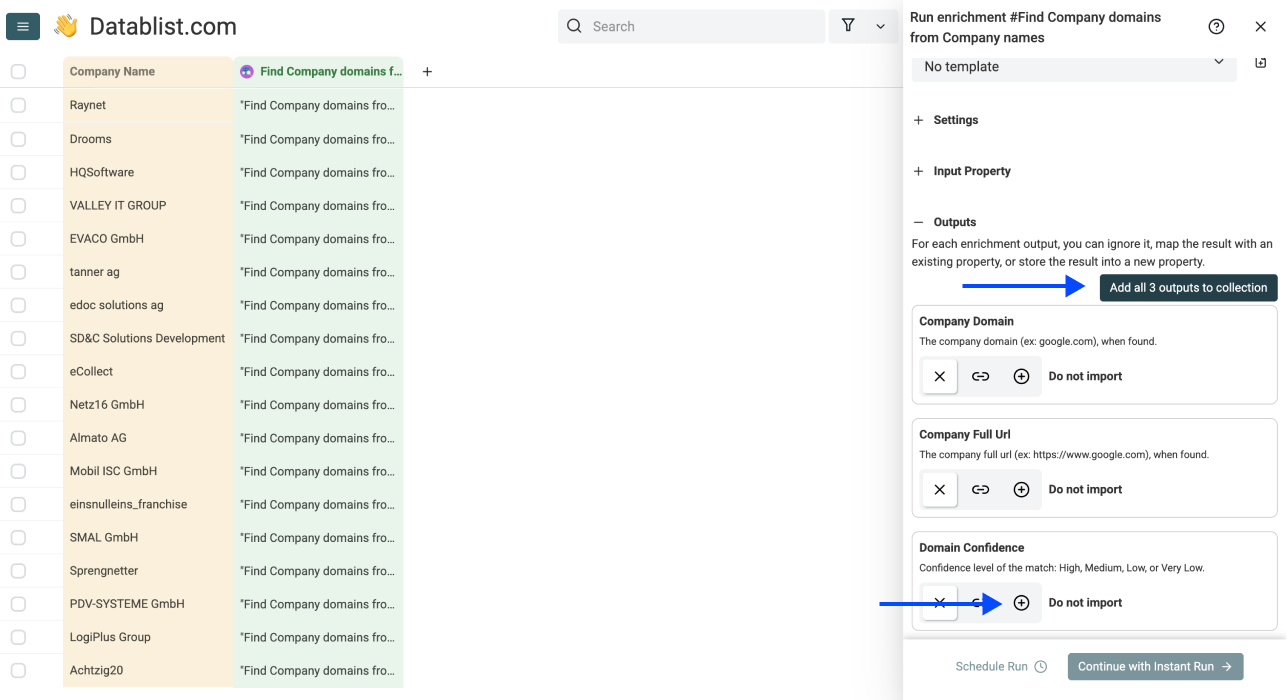
Step 5: Select Your Domain Outputs
1. Use the ⊕ icons or Add all 3 outputs to collection to add the outputs to your collection.
2. Click on Instant Run
Keep Domain Confidence and Status. They are what let you triage the run afterwards instead of trusting every row equally.
Step 6: Run The Enrichment In Bulk
Finally, configure your run settings by clicking on the chevron on the right side of the button. This will allow you to choose between the following options:
• Run on first 10 items: Good for checking results before committing
• Run on first 100 items: Useful if you want to validate larger samples
• Run on first {X} items: Lets you choose how many items you want to process
• Run on all view items: Process your entire list (or view if you've enabled filters)
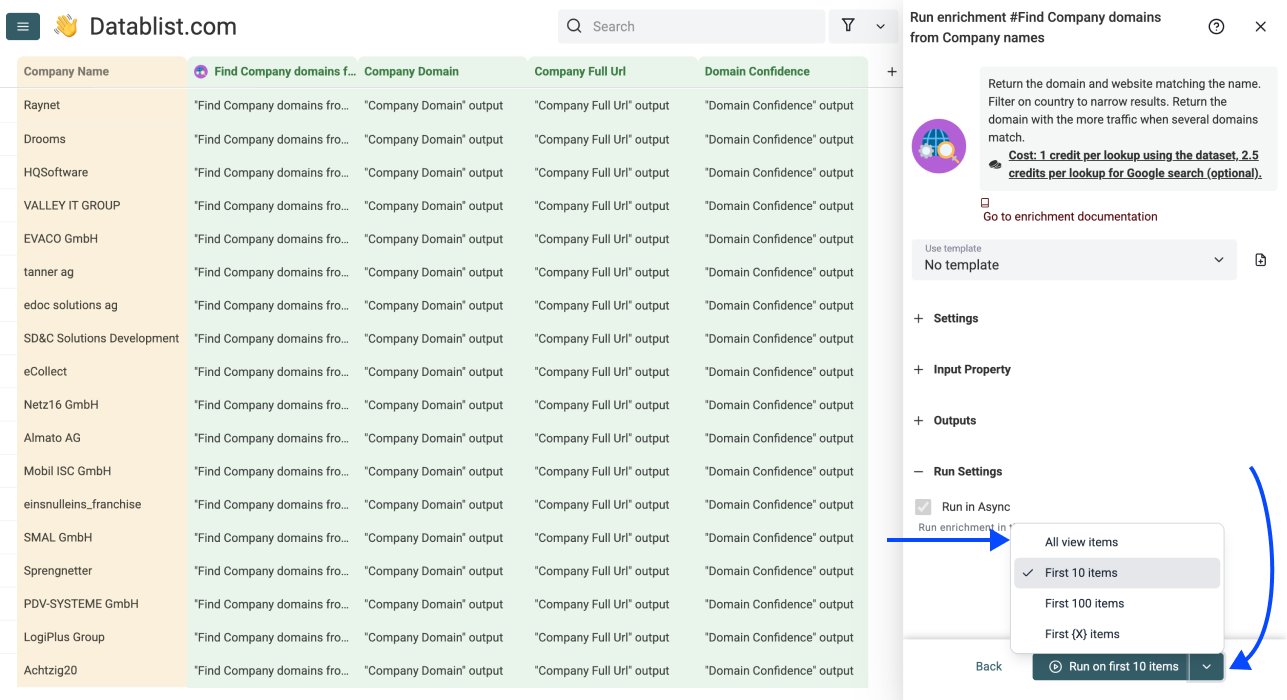
Once you have chosen your preferred option, click Run on X items
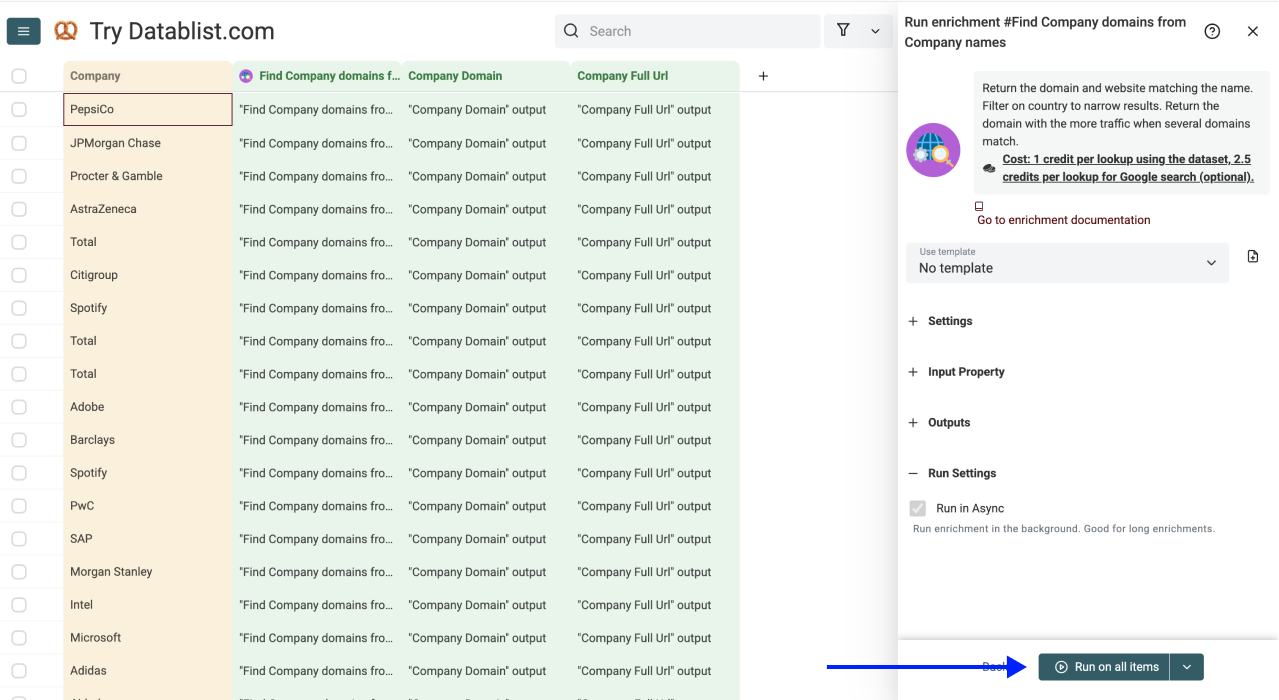
Within minutes, you have a column of verified domains sitting next to your company names, ready for the next enrichment.
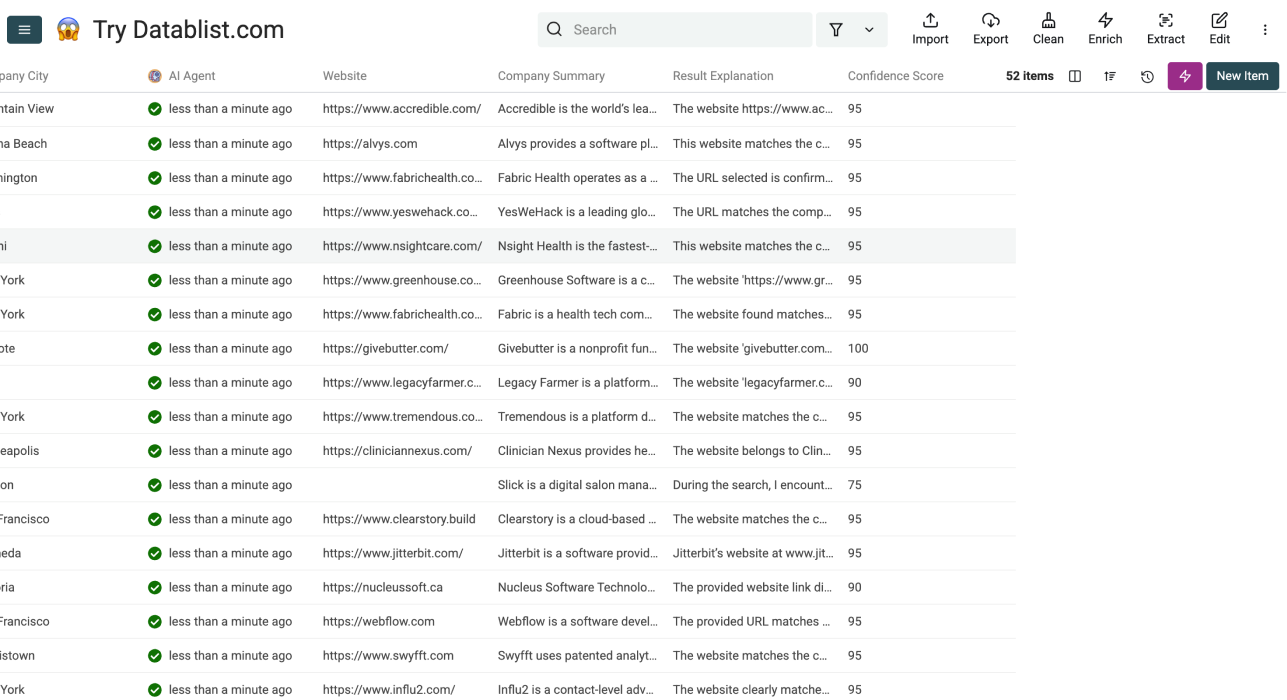
Sort or filter on Domain Confidence, then send the Low, Very Low, and not_found rows to the AI Agent with extra context such as a city or an industry.
Stop Doing Manually
What Datablist Can Do in Seconds
Give Datablist a try and see how easy workflow automation can be.
38,000+ users are already experiencing it!
